 The Dattatreyayogashastra, Dattatreya's Discourse on Yoga, is the first known text to explain a system of hathayoga. There are other descriptions of many of its practices in previous texts, but this is the first time when they are given the title hathayoga. Hathayoga is described alongside three other forms of yoga: mantrayoga, layayoga and rajayoga. Dattātreya said: “Yoga has many forms, o brahmin. I shall explain all that to you: the Yoga of Mantras (mantrayoga), the Yoga of Dissolution (layayoga) and the Yoga of Force (hathayoga). The fourth is the Royal Yoga (rājayoga); it is the best of yogas." - verses 8-11 The sections on the other three forms are brief, but Dattatreya writes in depth about the practices of hathayoga, the yoga of force. Not only that, but the text describes two separate forms of hathayoga: "the yoga of eight auxiliaries known by Yājñavalkya and others" (29), and "the doctrine of adepts such as Kapila" (131). THE YOGA OF EIGHT AUXILIARIES Yajnavalkya's yoga of eight auxiliaries is closely related to the well-known eight part system of Patanjali. It begins with Rules (yama) and Restraints (niyama) and proceeds to Posture (asana), Breath-control (pranayama), Fixation (dharana), Meditation (dhyana) and Absorption (samadhi). It is interesting the Dattatreya references Yajnavalkya but not Patanjali. Of the rules (yamas), "a moderate diet is the single most important, not any of the others. Of the restraints, non-violence is the single most important, not any of the others" (33). Posture (asana) is afforded a healthy couple of paragraphs, mentioning the sacred "84 lakh postures" (34) but describing only one: the Lotus Posture. Breath-control gets the most attention with more than 30 verses. The section describes alternate nostril breathing, advising 20 breath retentions in the morning, 20 at midday, 20 in the evening and 20 at midnight. The final three auxiliaries get relatively brief treatment before the text moves on to the second form of hathayoga. THE WAY OF KAPILA Separate from the above methods are the methods of Kapila, also called hathayoga. "Adepts such as Kapila, on the other hand, practised Force [hatha] in a different manner" (29). "The difference is a difference in practice, but the reward is one and the same" (131). Kapila's methods entail several mudras and bandhas, which involve the combination of physical position---"He should stretch out his right foot and hold it firmly with both hands" (133)---with breath-control---"he should hold [his breath] for as long as he can before exhaling" (134). The purpose of these practices is to move the winds and sacred fluids around the body. PRACTICE It is not stated explicitly if the two forms of hathayoga can be practiced together or whether they should be kept separate. Over the ensuing centuries hathayoga became consolidated, combining the practices of the eight auxiliaries with the mudra practices of Kapila. In modern decades, hathayoga has evolved into a non-specific term meaning "the physical practices of yoga". We will leave you with a final thought from Dattatreya: "[If] diligent, everyone, even the young or the old or the diseased, gradually obtains success in yoga through practice...the wise man endowed with faith who is constantly devoted to his practice obtains complete success. Success happens for he who performs the practices - how could it happen for one who does not?" (40-42). - All quotations are from: James Mallinson, Dattatreya's Discourse on Yoga, 2013.
1 Comment
 In a yoga class there are many complex and interesting postures to put the body in. They challenge our strength, flexibility, balance, concentration and coordination. It is easy to get lost in fascination with this complexity and lose track of the simplest, most fundamental things our body should be able to do: squatting; sitting up and its opposite; pushing up with the arms; and pulling up.
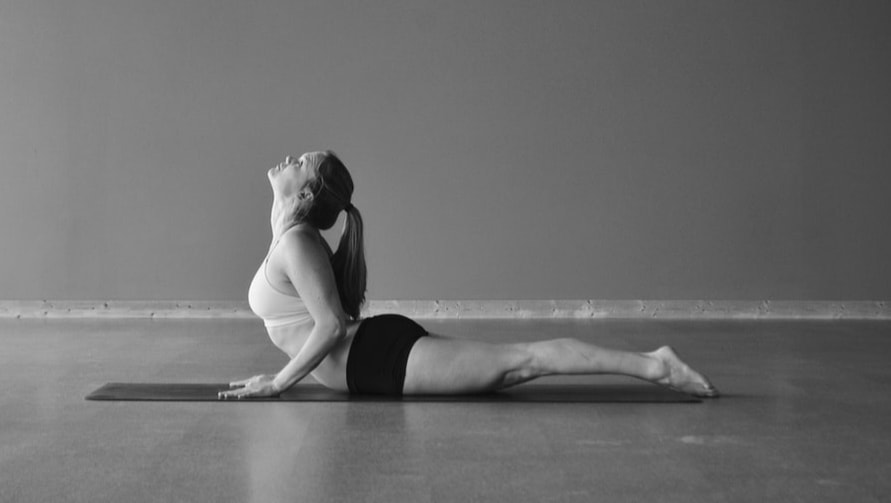
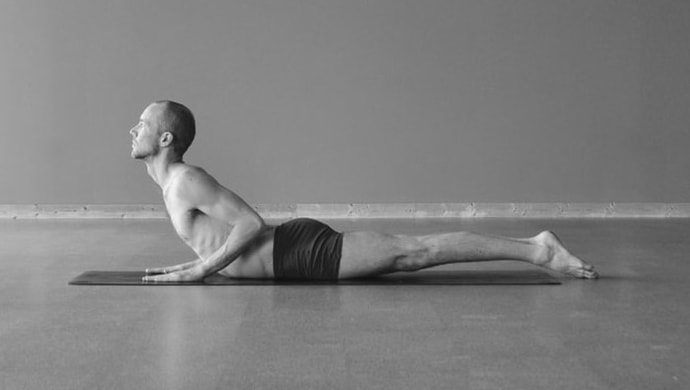
The opposite of a sit-up is also important. You may call it a back sit-up, back extension or Cobra Posture as it is often named in yoga (pictured at the top of this article). Either way, it involves lying on your abdomen and using your back muscles to bend your spine backward. The combination of these two motions---sit-up and back sit-up (cobra)---will strengthen and stabilize the spine.
These are 5 simple and important movements that every healthy body should be able to do to some degree. If we lose our ability to do these basic movements but still cultivate more complex ones, we are increasingly likely to develop imbalance and injury. Since the physical practices of yoga are about balancing the body more than anything else, it is always worth visiting and revisiting these movements. Without a balanced body, a balanced mind is almost impossible.
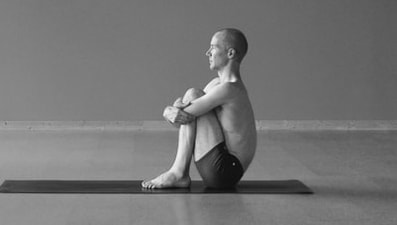
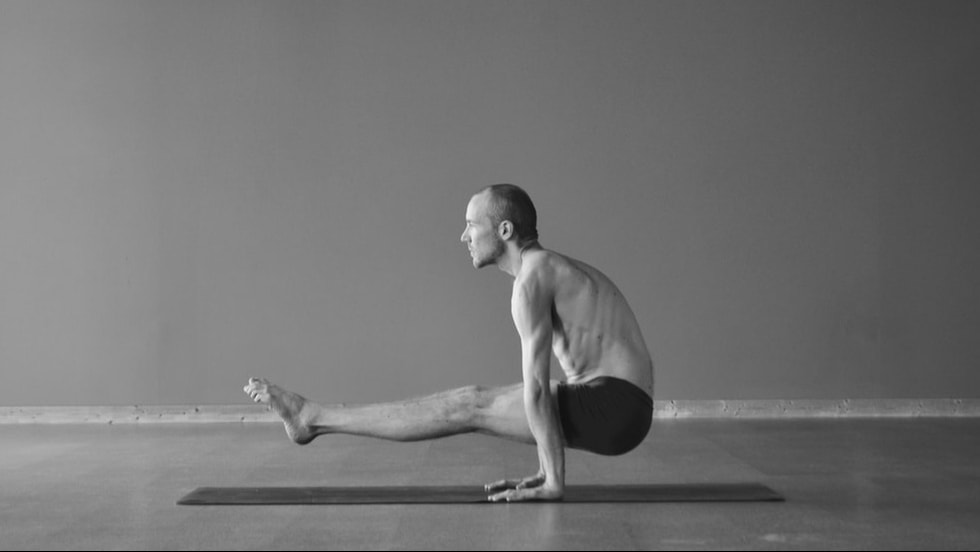 Palmstand is an unsung hero for the body, directly helping two of the most common physical ailments: a tight neck and a weak abdomen. These two problems lead to all kinds of issues in the body, nervous system and mind, making us uncomfortable, unhappy and perhaps even injured.
Palmstand is accomplished by sitting, placing the hands by the sides of the hips, and then lifting the butt and legs off the floor. It can seem impossible at first, but you can begin by lifting only the butt up and leaving the feet down. It can also help to put blocks under the hands, giving a little extra height. NECK & SHOULDERS In our culture we spend lots of time in front of computers, with our shoulders hunched up and forward. Over time this leads to a tight neck and tightness on the tops of the shoulders. This is exacerbated by the infrequency with which we push (or pull) things down with our shoulders. What ends up happening is the top of our shoulders and neck become overly engaged while the bottom of our shoulders, which act to counterbalance the top, are weak and underdeveloped. The way to remedy this problem is to develop strength underneath the shoulders by pushing them down strongly. This is where Palmstand comes in. The action of the posture requires a powerful downward push. When you do it, you may notice that your neck becomes long, as do the tops of your shoulders. If you do the posture regularly, you will develop strength under the shoulders, balancing the joint and releasing the neck and shoulder tops! ABDOMINAL STRENGTH It is well-known that most of us have weak abdominal muscles, and that this weakness can lead to all sorts of problems like poor digestion and back pain. This is why "core strength" has become so popular and exercise regimes like Pilates are making a comeback. In Palmstand the legs are held aloft by the abdominal muscles (along with the hip flexors), making them quite strong. If you find yourself struggling to lift the legs, know that your effort is strengthening your abs and that in time you will get them up. The posture ends up being quite engaged, with your muscles so tight that breathing is difficult. This is okay. Hold the posture strongly for a few seconds before relaxing and breathing. Then do it again. With practice, Palmstand balances the body and remedies two of the most common physical issues in our culture. 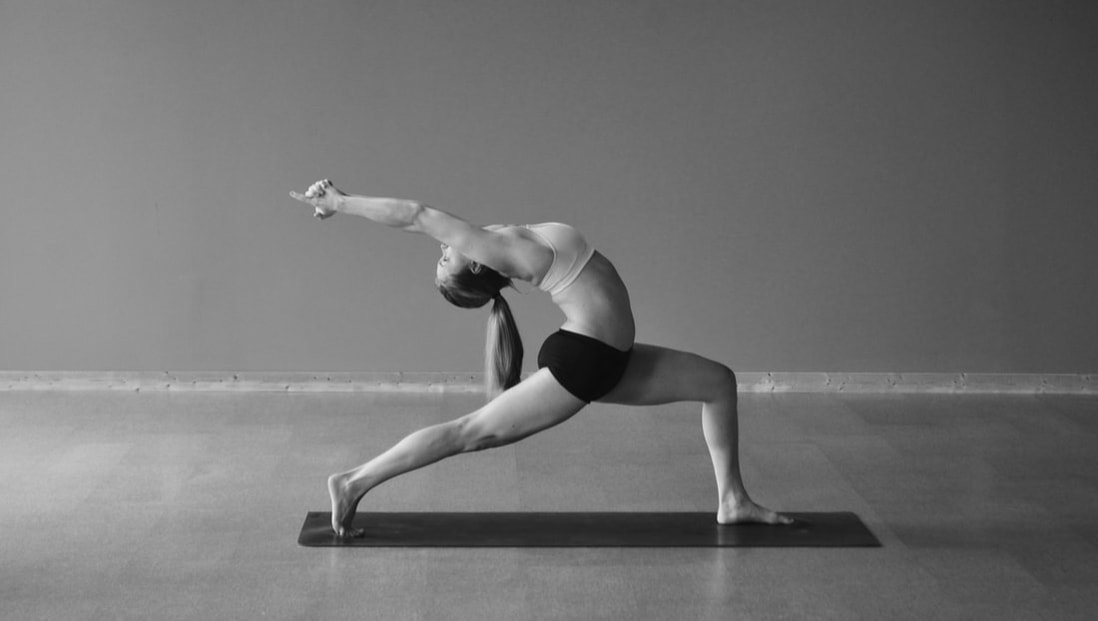 The Ghosh Yoga Mentorship program officially begins today.
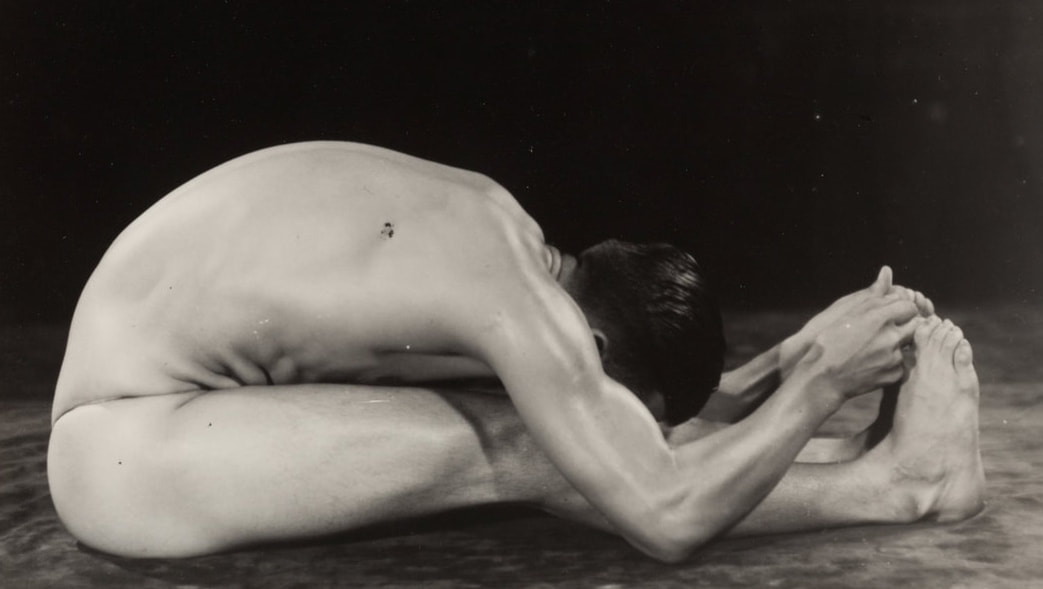
At the beginning of practice, when we know very little, it is enough to learn in a group setting like grade school or yoga class. In these situations information can be dispersed efficiently to a lot of people, so we can learn the basics and decide if we want to pursue a subject in depth. As we progress in our lives and yoga practice, it is increasingly important to get unique, individual instruction and feedback. It is said that the paths are many even when the goal is one. The more specialized we get, the less appropriate a classroom experience is since the lesson that is perfect for our neighbor might miss the point for us, and vice versa. The Ghosh Yoga Mentorship addresses the needs of yoga students and teachers who are ready for individual attention. You will have direct one-on-one communication with Scott and Ida via email and telephone, and they will help guide you on your path. - Ask the questions that come up, whether in your practice, teaching or study. - Get homework assignments, readings and tasks customized for your goals and needs. - Feedback and instruction on your postures or breathing. - Specific, individual meditation or mantra guidance. - Instruction and feedback on your teaching. - Advice about students, class structure, sequencing, etc. - Much, much more... It is impossible to predict your path and questions. What is important is having access to someone who can offer insight and support. Click here for more info about the Ghosh Yoga Mentorship program. 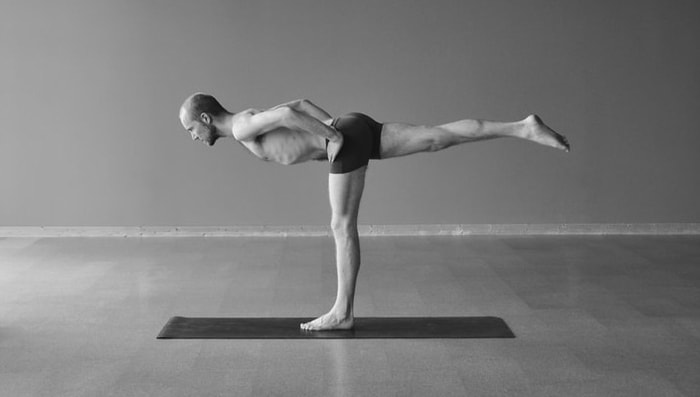 In the yoga world, forward folding is practically an obsession. We stand with our legs together and bend forward, we separate our feet and bend forward, we stand on one leg and bend forward, we sit and bend forward...you get the idea.
But most of us know that we need to strengthen our abdomen to support the spine and release the low back. The same can be said for the hamstrings: strengthening them will stabilize the pelvis and support the spine. HIP FLEXORS The muscles in the front of the hips, called the hip flexors, are another well-known area of tightness in the body. Their tightness is exacerbated by the amount of sitting we do. This tightness creates length in the hamstrings, because the two muscle groups are reciprocally related, i.e. the condition of one group is generally the opposite of the other. It is well-known that we need to lengthen the hip flexors to relieve hip and spinal issues. Because the hip flexors are reciprocal to the hamstrings, length (stretching) in the hamstrings will lead to more shortness/tightness in the hip flexors, which is undesirable. Another reason why the hamstrings should be strong, not long.
STRENGTHEN THE HAMSTRINGS
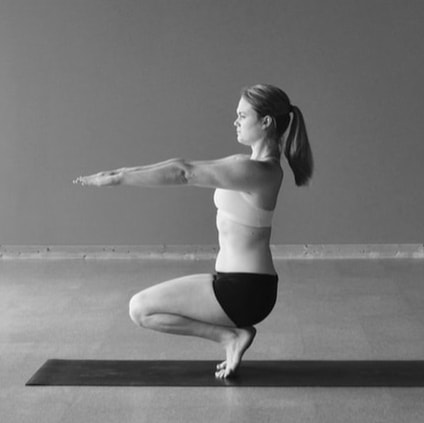
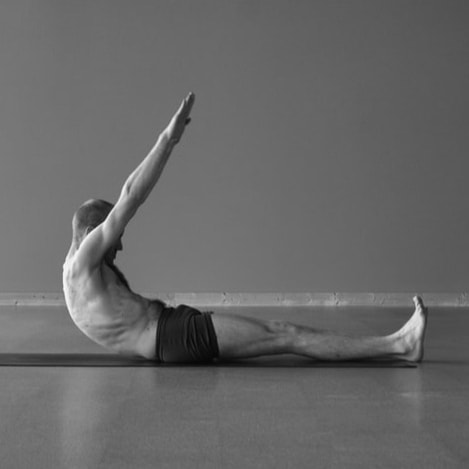
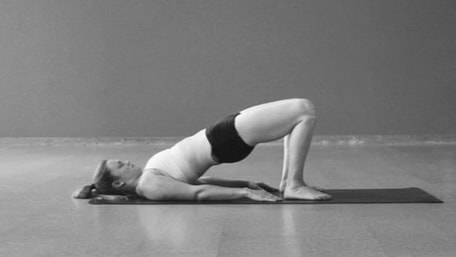
Hopefully you can see that strong hamstrings will help to alleviate many common problems in the pelvis and spine, and that over-stretched hamstrings will exacerbate frequent pains and imbalances. So, how do we strengthen the hamstrings? Squatting exercises and postures like Chair Posture go a long way to strengthening the hamstrings and glutes. They also integrate the hips with the abdomen, which is great. See the link on the right (Understanding Chair Posture) if you have questions about how to do Chair Posture. Another great way to strengthen the hamstrings is by tipping the body forward halfway, as in Balancing Stick, pictured at the top of this article. Balancing stick is done on one leg, but you can also do the exercise on both legs by standing on two feet and bending forward halfway. Don't go past halfway, since we're not trying to stretch the hamstrings. Two great strengthening postures can be done lying on the back: Bridge Posture and Jastiasana, both pictured above. Lie on your back and lift your hips in the air. You will need strength in the back of your hips, and this strength will help to release your hip flexors.
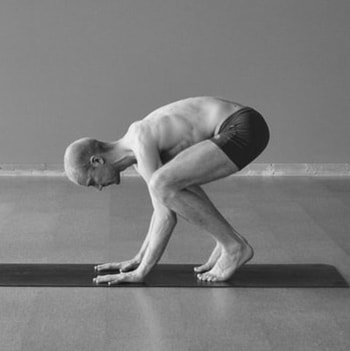
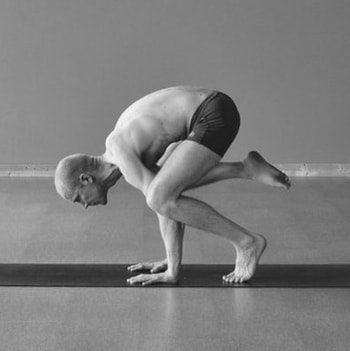
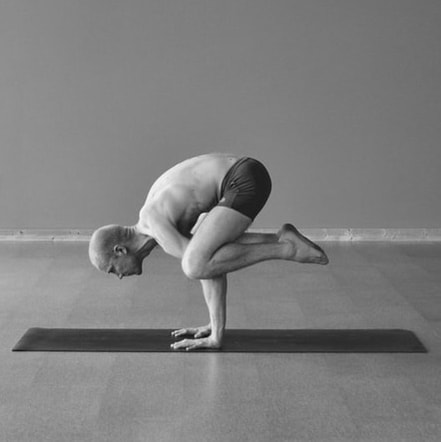
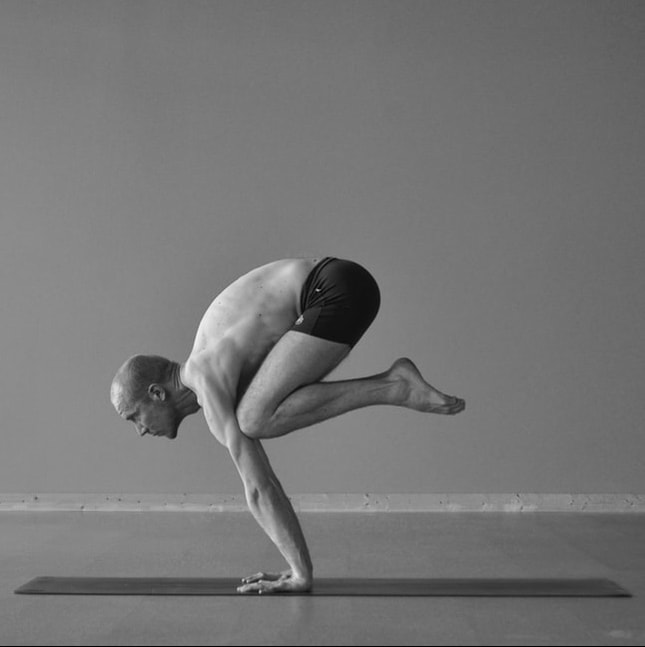
Crow Posture is a common arm balance, holding the body perched on the arms with the legs tucked underneath. It is usually the first arm balance taught in yoga classes, because it's relatively easy to get into and it allows a simple, step-by-step approach to balancing on the hands. HOW TO DO IT Start by standing, then bend forward and put your hands on the floor a little bit in front of your feet (see the picture "Setup 1" above on the left). Bend your knees and squat down a little; it will also help to bend your elbows. Put your knees on your arms above the elbows. Keep them there. It helps to squeeze the knees together, like you are pressing them onto the arms. This will prevent them from slipping down. Now shift your weight forward into your hands (picture "Setup 2) above middle). More and more weight will come into your hands and arms. At first you may not be strong enough to hold your whole body's weight on your arms. This is ok, just keep practicing and getting stronger. It may take weeks or months to build the strength. If your wrists hurt from the pressure, do short little sets, just a few seconds at a time. Once most of your weight is in the arms, lift one foot at a time (pictured "Setup 3" above right). This will build more strength in the arms while also moving you closer to balance. If it is easy to lift one foot at a time, lift both feet off the floor and balance just on your arms.
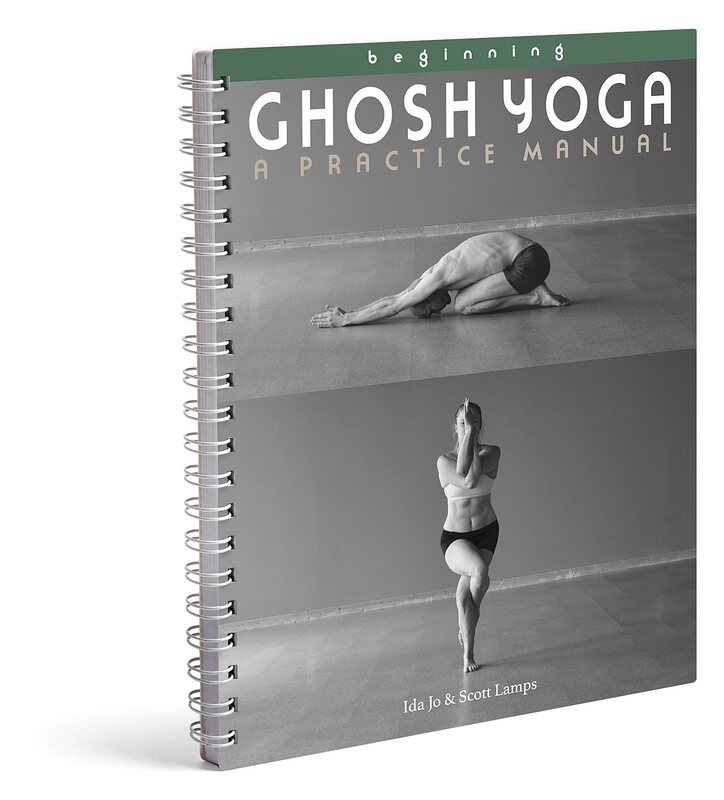
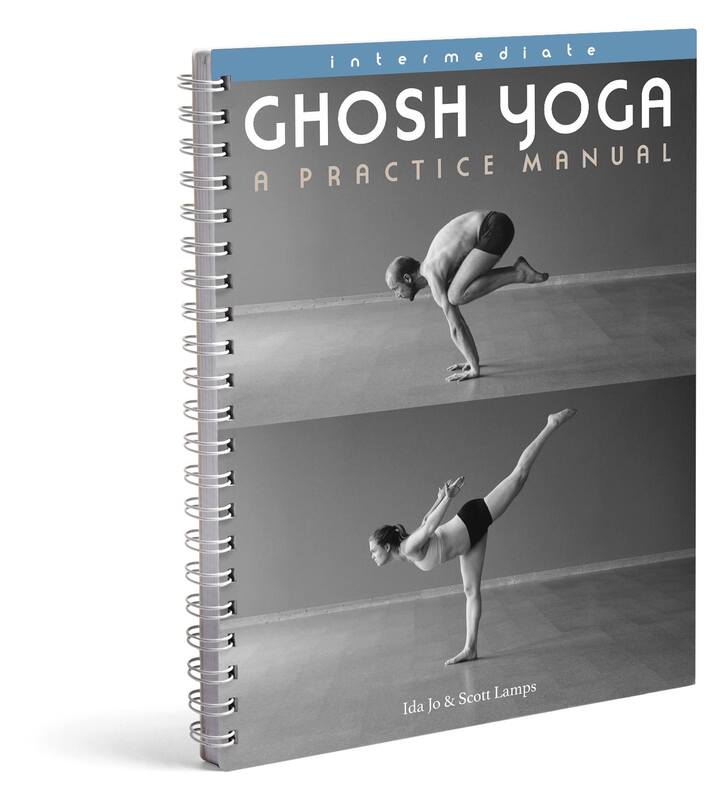
This week marks three years since the publication of 3 books: Buddha Bose's lost manuscript of 84 Yoga Asanas, the Beginning Ghosh Yoga Practice Manual and the Intermediate Ghosh Yoga Practice Manual.
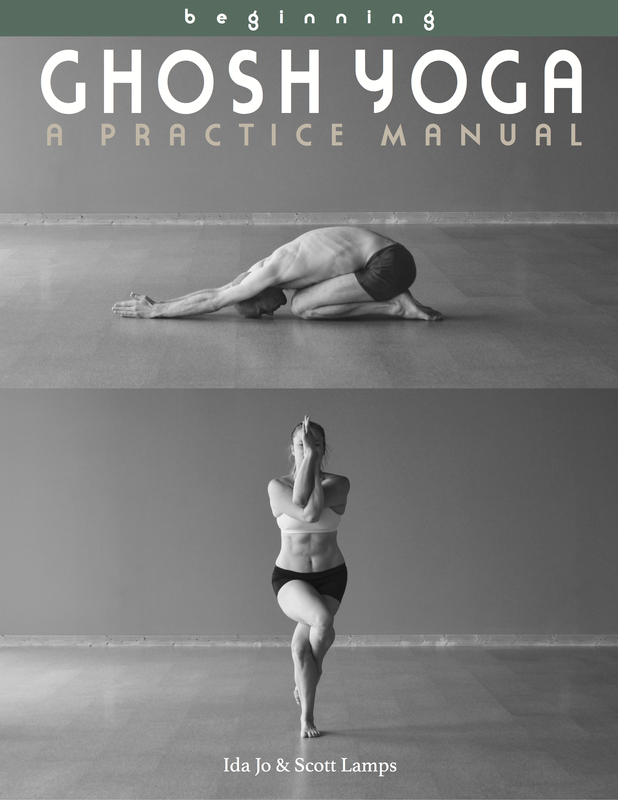
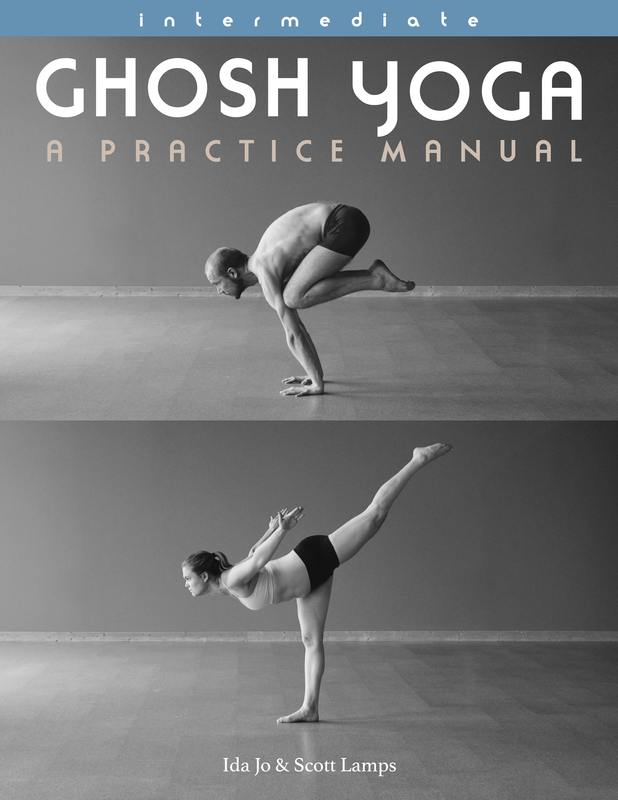
BUDDHA BOSE For anyone who doesn't already know, the manuscript for this book was created in 1938, containing more than 90 beautiful pictures of a young Buddha Bose. Bose was Bishnu Ghosh's first great yoga student in the 1930s. The manuscript contained instructions for 84 asanas and 10 mudras, but was never published for unknown reasons. Over many decades, it made its way to England and then the US, where Jerome Armstrong found it in a collection in Connecticut. We received permission to publish it and got funding support from hundreds of yogis on Kickstarter. The first edition is now sold out, and we are working on putting together a second edition that is smaller and easier to handle. BEGINNING PRACTICE MANUAL After teaching for a few years, it became clear that older people and beginners could use some simple instruction in accessible and beneficial postures. This book is a significant down-level from Bikram's class, intended for ages 60 and up, injured or true beginners. It includes some great therapeutic postures that build health and strength; ones taught by Bishnu Ghosh and Buddha Bose but overlooked in the past few decades. We are proud of this book, since it opens the practices to an underserved community. INTERMEDIATE PRACTICE MANUAL All of our book writing can trace itself back to this volume, the Intermediate Practice Manual. It is inspired by and draws heavily from our study with Tony Sanchez. It is meant for capable and comfortable yoga practitioners who are ready for some more complexity and depth in their practice. It has more than 50 postures, taking the yogi from a proficient beginner to the precipice of higher yogic practice. We never imagined ourselves as authors or historians, but the path of life is strewn with unexpected obstacles and opportunities. In celebration of their anniversary, we are offering 20% off purchases of these three books (or their digital downloads) with the coupon code "3years". 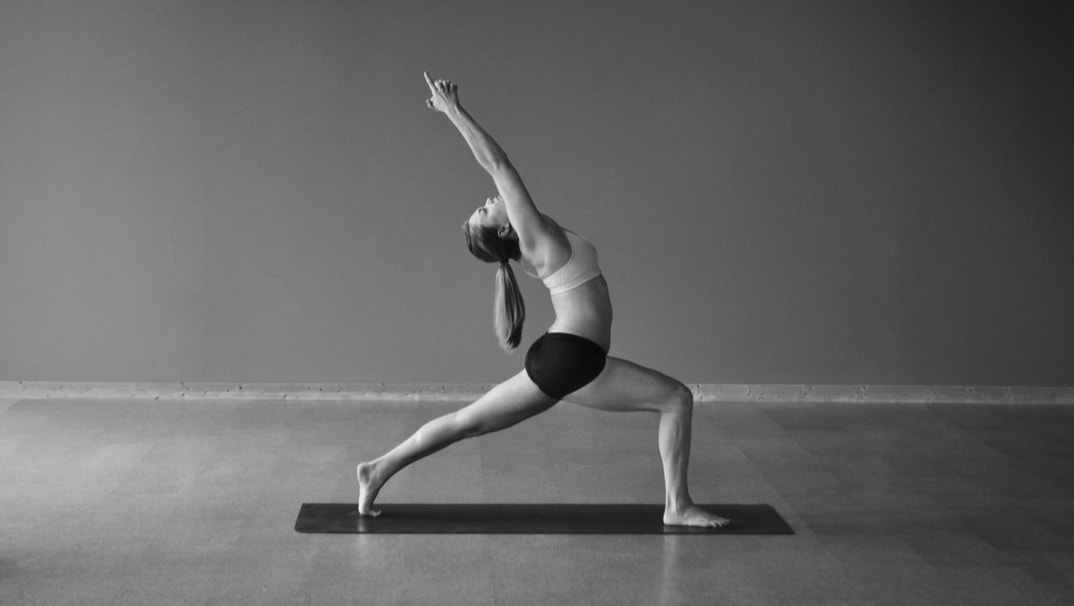 Most of us have tight hips, especially in the front where the thigh connects to the pelvis. We sit for so many hours each day and this area gets used to being bent, which is another way of saying that the muscles and tissues get tight.
At the same time, our butt muscles (gluteus maximus) get sat upon and become very weak. The combination of these two elements--tight hip flexors (on the front) and weak glutes (on the back)--create all kinds of problems in our body, usually beginning with back pain. These two sets of muscles are opposite each other across the hip, so they work as a team. When one side engages, the other relaxes to allow the hip to move. And vice versa. So, the easiest way to "stretch" the front of the hips is to engage and strengthen the glutes/butt. The best posture to do this in is a lunging position, pictured above. To stretch the front of the left hip, step the left leg back. Then bend the right knee a little. You may already feel the stretch in the left hip. Straighten your left leg and squeeze your left butt/glute. The sensation in your left hip will intensify. If you're not used to doing this, it is normal for the butt to engage for a second before relaxing again. When this happens, just squeeze your butt again. Engage it 5 or 10 times and then switch sides. You will strengthen an important muscle, the glutes, while releasing a tight area, the front of the hip.  It is Practice Week this week, and we are in Pennsylvania. The days are intense and draining: 5 hours of practice and another 3 hours of discussion. It is an all-out extravaganza for the body and mind. Needless to say, the end of the day finds us exhausted, and it only compounds over the course of the week.
But I have always been a morning person, and no matter how tired I am, I usually wake up early. I say this with no sense of pride; I would often choose to sleep later if I could. But once my internal clock decides it’s time to wake up, there is no way of returning to rest. So I get up. My favorite thing to do in the morning, aside from doing breathing practices, is organize information. It is so quiet and peaceful, and my mind is full of new connections that were generated while I slept. I love to write down little bits of information that I’ve learned and questions I have. I read and research to find answers to my questions. Sometimes I gain a new sense of understanding. This morning, I sat in the yoga room here in Pennsylvania before anyone else was up. I gathered pictures and bits of info and placed them into a slide presentation. I rearranged their order until a coherent story appeared. I looked up, saw myself in the mirror and realized that this is a pattern with me: rise early and organize information.
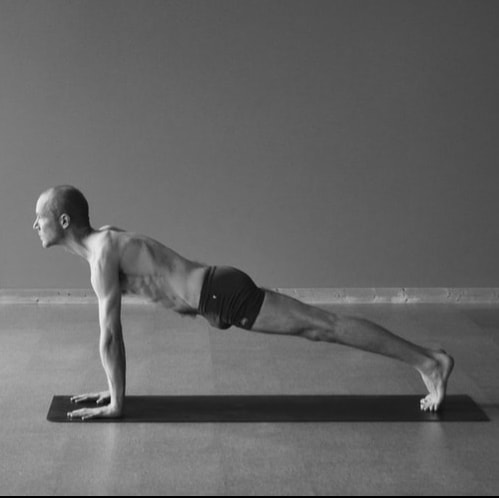
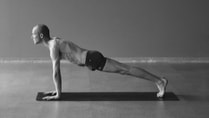
Here are three of the simplest and most useful postures you can do. Do them in the morning right after you get out of bed, do them in the middle of the day for a boost of energy or to reduce your stress. You can do them late in the day, too, but then you should do the Wind Removing Posture twice instead of once. It will prevent your nervous system from getting too energized before bed.
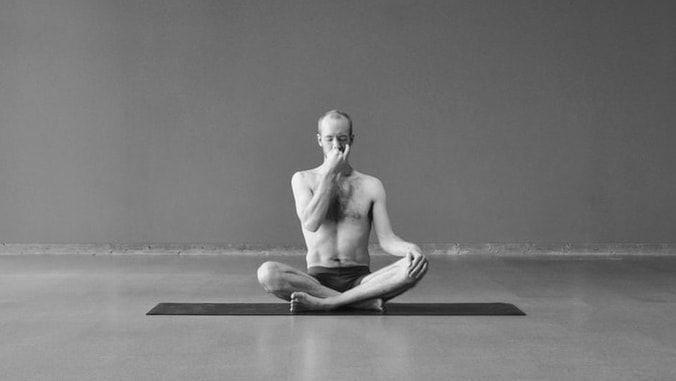
PLANK (pictured above left) This posture will strengthen your arms, shoulders, chest and abs. It can help improve your posture and reduce back pain. Hold the body as straight as possible, including the spine, hips and legs. It will be difficult to breathe, but that is because you are using your muscles. Take small breaths, keep your neck and face relaxed, and hold the posture for a minute if you can. Then rest and breathe normally for a minute. COBRA (pictured above center) This posture will strengthen your back and release tension in your chest and throat. It compresses the kidneys and adrenal glands in your mid-back, helping to reduce stress by reducing cortisol. It will help to stabilize your spine, reduce back and neck pain. Lie on your belly with your hands under your shoulders. Lift your head and shoulders using the muscles of your back. You may need your arm strength a little bit, but use it as little as possible. You will feel the muscles on your back near your spine light up. Breathe up high in your chest, near your collarbones. Hold it for a minute if you can. Then relax and breathe normally for a minute. WIND REMOVING, SEATED (pictured above right) This posture calms your central nervous system and stimulates your digestion and immune system. It is so simple to do, yet incredibly effective. Sit and pull your knees close to your chest. Wrap your arms around your legs. Now breathe deep into your belly. This is important. As you inhale, you will feel your abdomen expand and press into your legs. This type of breathing affects your nervous system, digestion and immune system. Do this for a minute and then lie down on your back and relax for at least one minute. |
AUTHORS
Scott & Ida are Yoga Acharyas (Masters of Yoga). They are scholars as well as practitioners of yogic postures, breath control and meditation. They are the head teachers of Ghosh Yoga.
POPULAR- The 113 Postures of Ghosh Yoga
- Make the Hamstrings Strong, Not Long - Understanding Chair Posture - Lock the Knee History - It Doesn't Matter If Your Head Is On Your Knee - Bow Pose (Dhanurasana) - 5 Reasons To Backbend - Origins of Standing Bow - The Traditional Yoga In Bikram's Class - What About the Women?! - Through Bishnu's Eyes - Why Teaching Is Not a Personal Practice Categories
All
Archives
April 2024
|


 RSS Feed