 INTENTION
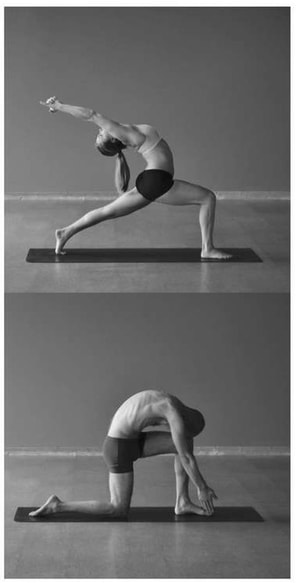
This short group of postures is our first movement after breathing. We bend the spine alternately forward and backward. The asymmetry in the lower body—one leg forward and one leg back—improves our balance and body awareness while opening the hips and lower back. Connect with the warming, strengthening and opening sensations. Try to be stable, though at first you may feel wobbly. Work to feel your spine bending evenly in the backbend and forward bend. Avoid any sharp sensation in the spine—it means you have gone too deep without support. BREATH In the backbends, the lungs are extended so the breath will feel shallow. Keep the breathing relaxed even though the breaths will be about 50%. In the forward bends the lungs are compressed as we engage the chest and abdomen. Focus on the breathing muscles on the backside of the chest. Breath will be about 60% in these positions, but it will feel much more relaxed than in the backbends. BENEFITS These postures make the spine exible, releasing the muscles of the deep spine and low back. They stretch and strengthen the shoulders, chest, back, pelvis, legs, feet and abdomen including the psoas. They improve balance. The forward bend compresses the intestines, stomach, liver, pancreas and throat, encouraging circulation in the digestive system and the endocrine system. An excerpt from the Ghosh Yoga Practice Manual - Intermediate
0 Comments
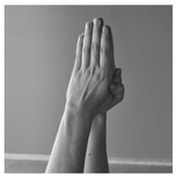
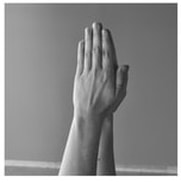
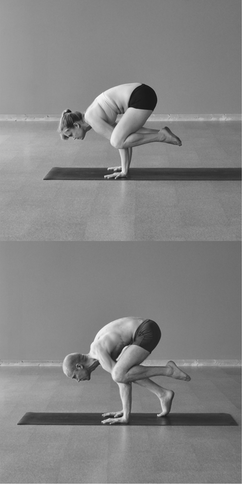
When linking the hands together, you have a choice of grips as shown above.
Grip 1 (pictured above left), with the fingers interlaced and the pointer finger extended, is the most beginning of the grips. By linking the hands together we can engage the arm muscles to straighten the arms and stretch and strengthen the shoulders. Grip 2 (pictured above center), with the palms together and only the thumbs crossed, is more challenging than Grip 1. Each arm straightens with mostly its own strength, so our shoulders, chest, back and arms need to be more flexible and strong. The crossed thumbs allow for a little bit of bracing and support from the opposite arm. Grip 3 (pictured above right), with the palms flat together, is the most challenging and advanced of the grips. Each arm is completely independent, so the shoulders and arms become symmetrical, not relying on the stronger arm to carry the weaker one. HOW TO CHOOSE YOUR GRIP Simply put, choose the most advanced grip you can while maintaining the integrity of whichever posture you are practicing. This requires some body awareness. If, while in the posture, you feel your arms or upper body start to collapse or become uneven, change your grip to a more stable version. As you transition to more advanced grips, draw your attention and focus away from the hands and into the shoulders and torso, building symmetry and awareness of the center of the body. An excerpt from the Ghosh Yoga Practice Manual - Intermediate 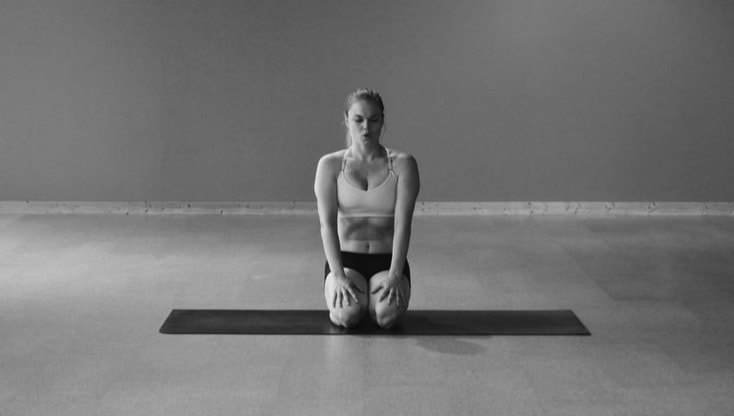 INTENTION
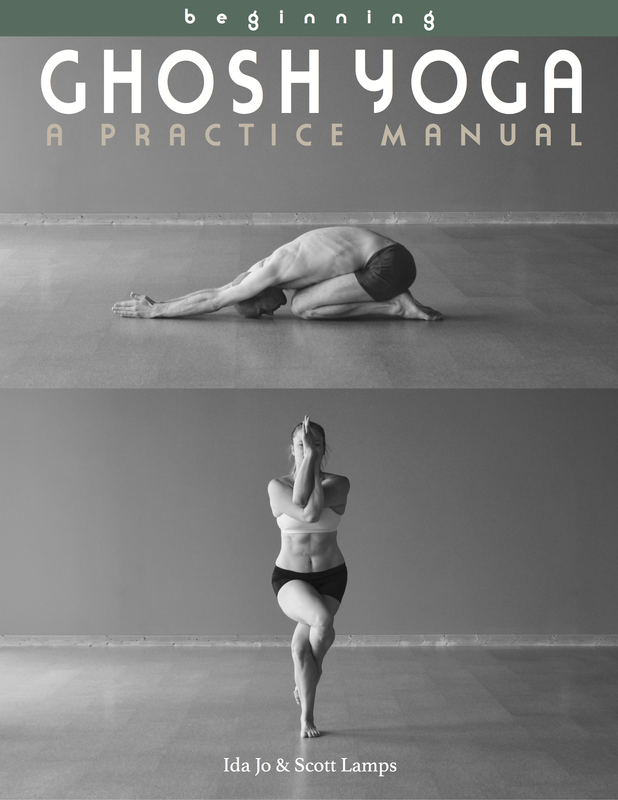
The focus of this breathing exercise is alternately relaxing and contracting the muscles of the abdomen. Keep the ribcage and shoulders as still as possible. This will be diffcult, especially as you become fatigued. This exercise removes carbon dioxide from the blood, so it is normal to feel a little dizzy. If you become moderately or significantly lightheaded, stop and rest while breathing normally. Then continue at a slower pace. BENEFITS This exercise strengthens the abdominal and lower back muscles. It reduces the carbon dioxide in the blood. NOTE This exercise is basically controlled hyper-ventilation. It reduces the amount of carbon dioxide in the blood, making it easier to hold the breath afterward, as your body returns to its normal oxygen-carbon dioxide balance. You may notice, after completing the exercise, that your breath becomes slow and shallow, perhaps even suspending altogether. Embrace this development, it is one purpose of the exercise. Stillness in the breath is an important landmark on the journey toward a still mind. An excerpt from the Beginning Ghosh Yoga Practice Manual. 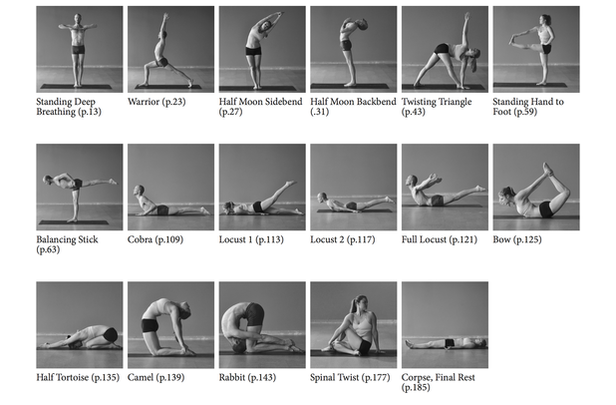 A lot of people in our Western culture suffer from back pain. It often comes from spending so much time sitting in chairs, in cars and on sofas. The muscles of the back become weak at the same time as the hips and legs become tight. Most back pain can be eased by strengthening the back and stretching the hips. The postures in this sequence are intended to do just that. They lengthen the spine, pelvis, hips and legs, and they strengthen the back.
It is a common misconception that stretching the back will relieve back pain. Generally, the back is already too loose and weak, so stretching can irritate the problem and even make it worse. This sequence takes about 30 minutes to do. Excerpt from the Beginning Practice Manual.  For the purposes of practicing yoga, keep your stomach light. Some people do best without eating or drinking for 2-3 hours prior to practicing. Others find that hunger hinders their ability to relax and focus, preferring to eat something light within an hour or two before practicing. Use your best judgment and find what works for you. In general, easy-to-digest foods are best, like fruits and vegetables. Nuts and seeds are great too.
Always drink plenty of water before and after practicing yoga postures. Listen to your body and give it what it needs to function. Try reducing your caffeine, alcohol and sugar intake. They give little nutritional benefit while being difficult for the body and mind to digest. You might also try reducing dairy, eggs and wheat, as they are common low-level allergens. No matter what, practice, even if you don’t follow these nutritional guidelines. Get plenty of sleep, at least 7 hours per night. Sleep is where our body and mind regenerate. Our metabolism and physical and mental functions of the body need sleep in order to work properly. If you are tired or exhausted, rest. No amount of food, stimulants or yoga can replace sleep. Excerpt from the Beginning Practice Manual.
INTENTION
In this group of postures we bend the spine a little deeper, keeping a symmetrical lower body for many of the positions. This takes a little more body awareness than the Salute to Gods and Goddesses. Our imbalances are more easily masked in symmetrical postures, so take care not to favor the right side over the left or vice versa. In the Sun Salute we begin to engage the upper torso, shoulders and arms, unifying the musculature, strength and energy of the body. BREATH If you are familiar with yoga, you might be familiar with the “Sun Salutation.” It is a common exercise in modern yoga classes. While most flowing classes encourage one inhale or one exhale per movement, here we move more slowly. Take a full one to three breaths in each position. Move the body mindfully and with attention to detail. Each position of the body will engage the breathing muscles differently, changing the ease of the breath. Pay attention to this change. Relax and breath slowly. When we have weight on the arms, the breathing muscles of the chest become engaged, so the breath will be shallower. BENEFITS This series builds flexibility in the spine and torso. It builds strength in the arms, shoulders and abdomen. It stretches the hips, legs, feet and knees. NOTE There are many versions of the Sun Salute from different yoga traditions. At its core, it is an effective way to wake up the body and mind, moving through several positions, engaging and loosening many of the major areas of the body. This version includes Plank and Side Plank variations for additional strengthening. Exerpt from the Intermediate Practice Manual.
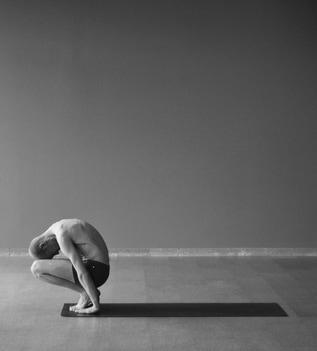
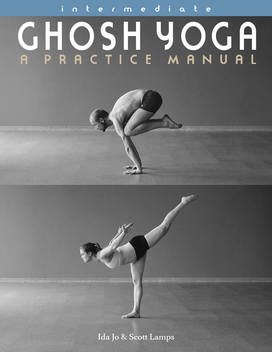
CROW
This posture teaches us how to balance our body on our arms. Arm-balancing requires strength but also focus and courage. At first your legs will not want to stay balanced on your arms. It requires significant abdominal and hip strength to keep them perched there. Push the knees firmly into the arms and lift them up toward the armpits. This will help you hold the body with control. If you are not used to putting weight on the wrists, they will become tired and sore quickly. Be patient and build the strength gradually. Stay away from pain and try again tomorrow. BREATH The chest and abdomen are engaged in this posture, so breaths will be short, about 50%. Use the breath to strengthen the torso and create stability and structure in your chest. Don’t let the shortness of breath cause you to panic. Keep the mind relaxed and focused as your body tightens to hold the posture. BENEFITS This posture builds focus by balancing upside down and on the hands. It builds strength in the wrists, arms, shoulders, chest, abdomen and legs—a full-body posture. It stretches the shoulders and upper back, and is a gentle forward bend of the spine. Excerpt from the Beginning Practice Manual. 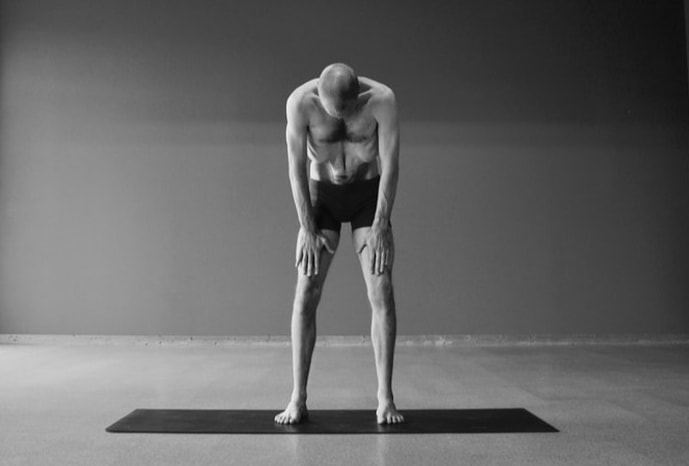 Learning to control the breath separately from muscular engagements is the beginning of profound mental change that propels us beyond the practices of asana.
The practice of Nauli accomplishes 5 important things: 1) It strengthens and balances the abdominal muscles. It reveals and slowly heals imbalances of the rectus abdominis (6-pack), and awakens the transverse abdominis—the large but often ignored muscle vital for breathing, holding the intestines and organs in, and supporting the spine. 2) The thoracic (chest) vacuum reduces the pressure in the intestines, stomach and rectum, encouraging movement and improving digestion and elimination. This also helps prevent prolapse of the organs and rectum. 3) The suction of the abdomen into the chest cavity improves the relaxation and range of motion of the diaphragm, our main muscle of breathing that is difficult to access through other exercises. 4) External breath retention (holding the breath out) stimulates the parasympathetic nervous system, lowering the heart rate and stimulating digestion, relaxation and immune function. 5) It refines the control of our nervous system, teaching us to separate the muscles of breathing from the in- and out-flow of air. The first four stages of Nauli are: 1. 4-Part Breath 2. Uddiyana 3. Agni Sara 4. Engagement of the rectus abdominis It is important to have good control over each stage before progressing to the next, as each stage is built on the previous ones. NOTE Nauli is best practiced first thing in the morning, before eating and after emptying the bowels. The emptier the stomach and intestines, the more comfortable and effective Nauli will be. This is an excerpt from the Advanced 1 Practice Manual.  Often the first several postures of yoga practice are done standing. We exercise the body gradually, beginning with simple movements in the big muscles and joints, eventually moving to deeper and more complex positions.
As you move through the different positions, realize that every day will be different. Our bodies and minds respond differently depending on the time of day, the temperature, our state of mind, our energy level, etc. Always strive to move gently and fluidly; focus on maintaining ease in the body, breath and mind. Don’t strive for depth or intensity. Simply move the body with control. In each posture, come to a place where you can be still. Focus your mind on the calmness of your breath. You may feel stretching in an area where you are tight, and you may feel burning or exhaustion in an area where you are weak. In either case, find a place where your ability to relax is equal to your effort. This is important. You will increase in flexibility and strength, but even better, you will cultivate calmness, patience and perseverance. Excerpt from the Beginning Ghosh Yoga Practice Manual. |
AUTHORS
Scott & Ida are Yoga Acharyas (Masters of Yoga). They are scholars as well as practitioners of yogic postures, breath control and meditation. They are the head teachers of Ghosh Yoga.
POPULAR- The 113 Postures of Ghosh Yoga
- Make the Hamstrings Strong, Not Long - Understanding Chair Posture - Lock the Knee History - It Doesn't Matter If Your Head Is On Your Knee - Bow Pose (Dhanurasana) - 5 Reasons To Backbend - Origins of Standing Bow - The Traditional Yoga In Bikram's Class - What About the Women?! - Through Bishnu's Eyes - Why Teaching Is Not a Personal Practice Categories
All
Archives
April 2024
|

 RSS Feed